Computational Modeling in Physics

As part of my action research project for my Master of Natural Science degree from Arizona State University (home of Modeling Instruction), my research partner Mr. Wirth and I looked at how we could apply computational modeling at several key points in the curriculum to improve students’ understanding of physics.

We worked with a small sample group, but we had some promising results. Spreadsheets allowed students to solve more complex problems than can typically be solved in a first-year physics course. Spreadsheets freed students a bit to think about the problem rather than focusing on the computation, though learning to graph and write equations in excel was challenging.

You can find our complete report here.

Integrating Math, Science, and the Common Core into Career & Technical Education

On December 12, 2013, I had the pleasure of leading St. Landry Parish Career & Tech Teachers in a workshop on how to integrate math and science across the curriculum.  Here, I’ll post links to resources referenced in the presentation.

Performance Tasks

Project-Based Learning

Credits:

http://www.achieve.org/CCSS-CTE-BridgingtheDivide
http://www.achieve.org/ccss-cte-workshop-planning-tools

Integrating CCSS Math & ELA Practices in Science

On November 21, 2013, I had the pleasure of leading a professional development workshop for St. Landry Parish teachers on integrating common core math and ELA into our science classes.  Here you will find my presentation and links to the resources referenced in the presentation.

 Project-Based Learning Resources

Whiteboarding Resources

Graphing Calculator Alternatives

Below are a set of alternatives to a TI-84 graphing calculator.  Whether you have a computer, iPhone, iPad, or Android device, there are many options for you.

Web-based

Desmos – this can do some pretty cool things.  Check it out.

Windows PC Computer

Follow these instructions to install Wabbit-emu, a TI-84 calculator emulator. (Instructions courtesy of Brockport Central School District).

iPhone/iPad/iPod

None of these have been tested by me personally, but the reviews are solid:

Free Graphing Calculator (free)

Quick Graph: Your Scientific Graphing Calculator (free)

Android

Algeo Graphing Calculator (free)

Wabbit Emu (app) TI-84+ emulator, requires a calculator ROM file

Andie Graph (another TI-83 emulator, but requires some work to set up)

Mac Computer

See Mr. Cheng’s site for instructions

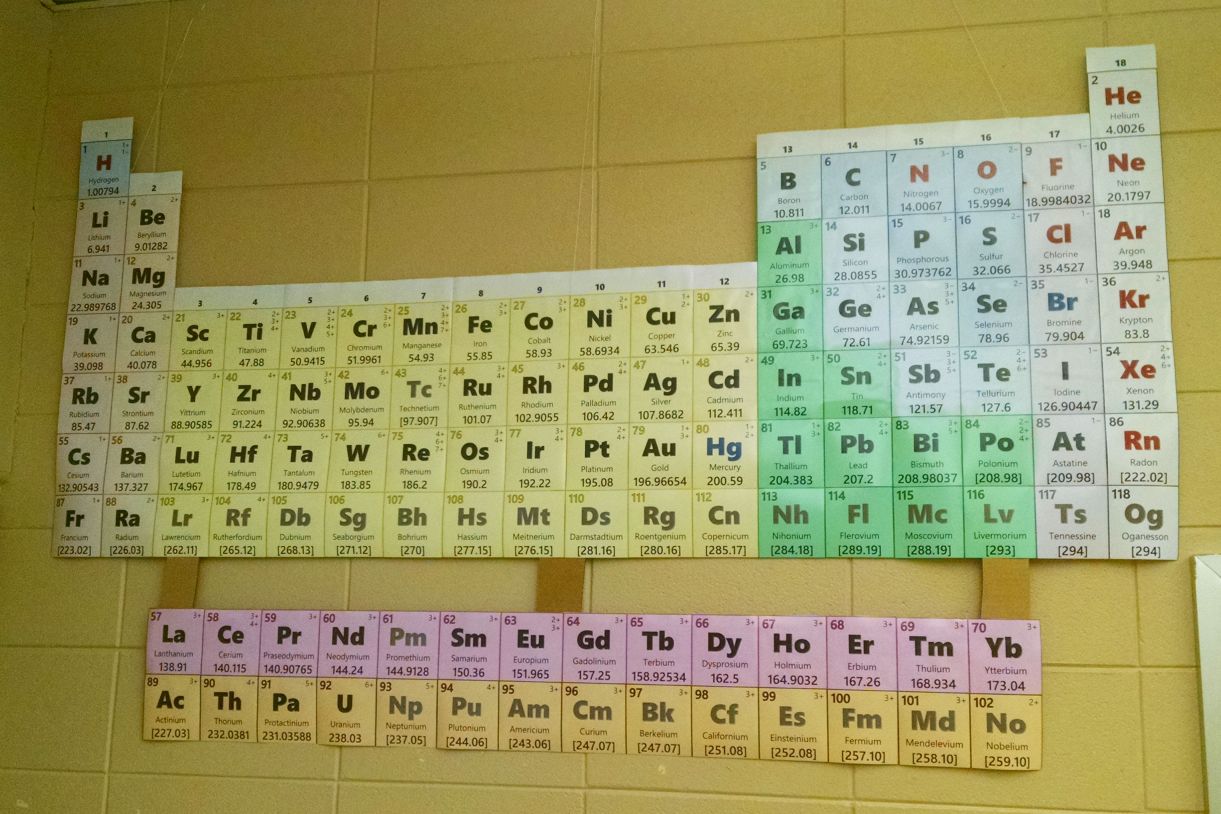
Wall-Size Periodic Table

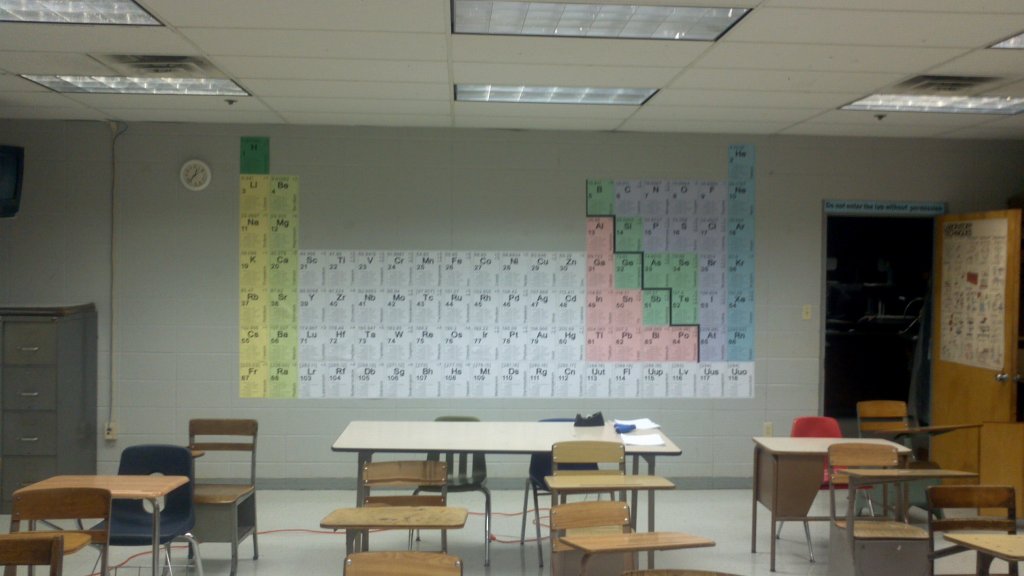
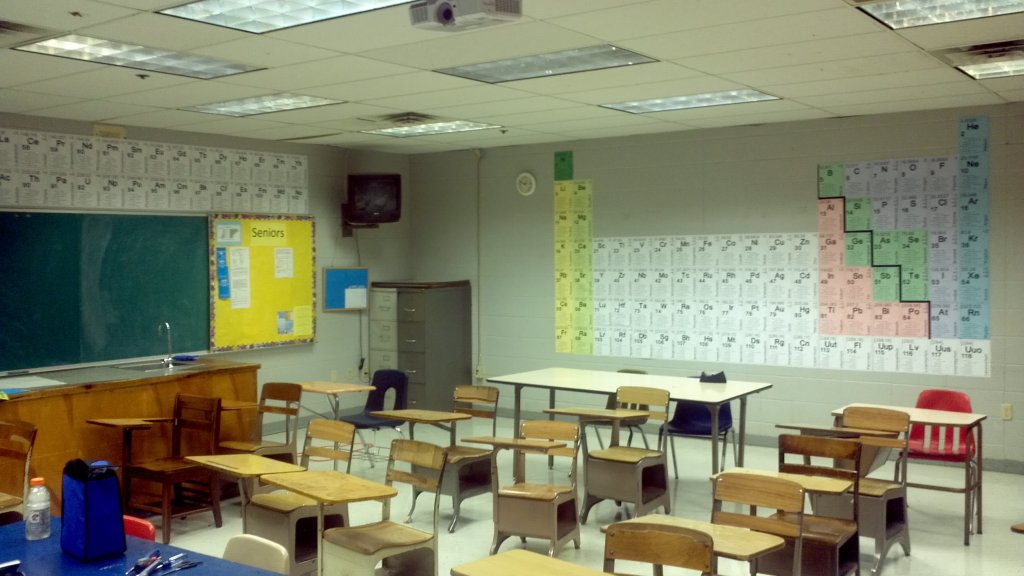
I’ve produced a printable periodic table for posting on the wall in my classroom (updated April 2017). I thought other teachers might wish to do the same, so I’m making it available here.

This version is designed to be printed in color on 4×6 photo paper (I chose matte finish for less glare, but glossy might work too).  I had mine printed at Amazon Prints for about $11.00, though many local or chain shops may have special deals that would allow you to get this printed pretty cheaply. Each individual element block is then taped together on the back or glued onto a backing material. The final dimensions are about 6 feet wide and 3-4 feet tall.

The periodic table features include:

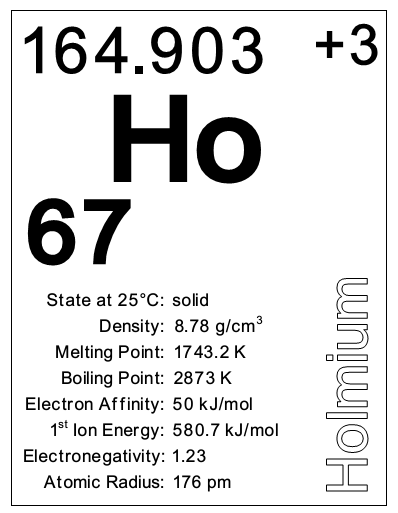
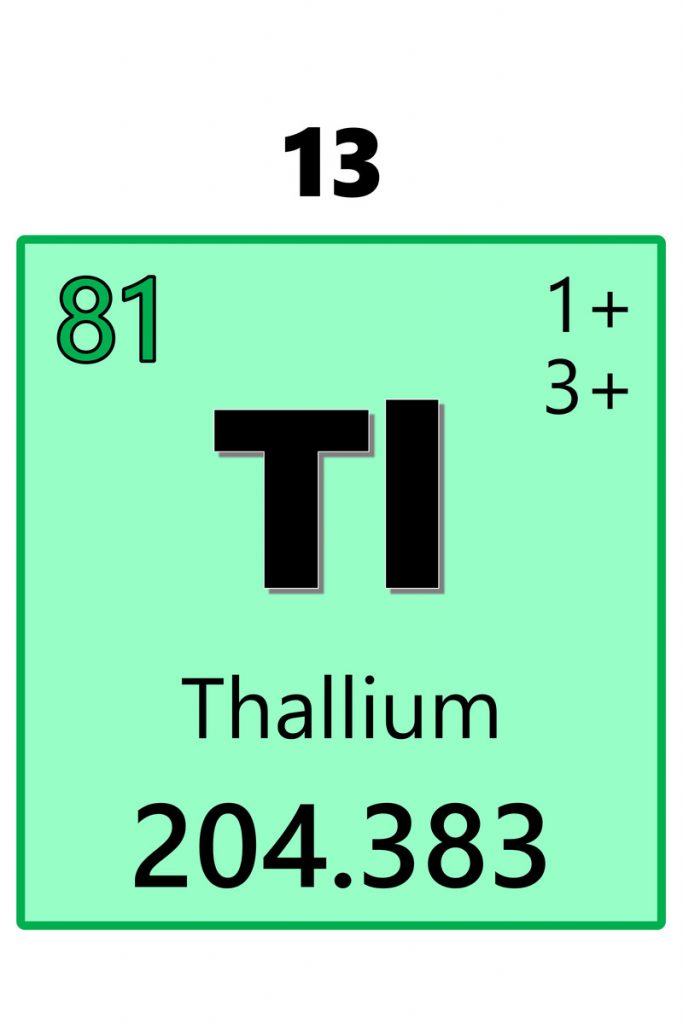
  • Element name, symbol, atomic number, and atomic mass
    • Includes updated names and symbols adopted by IUPAC through 2016
  • Common ions for most elements
  • Color-coded background for element families/groups
  • Symbols in black (solid), blue (liquid), or red (gas) elements (at room temp.) Synthetic elements are in gray.
  • Group numbers above each column (1 – 18)

To print your own, here is a zip file of jpeg photos that you can upload or bring to your photo printer:

Periodic Table Images ZIP file

The source files used to produce the images are provided here should you want to make any adjustments.  The element database is an excel file, which is used in combination with word’s mail merge capabilities.

PT-4×6-Color-Merged

PT-4×6-Color-Template

PT-Element_Data_Base

Note: images were produced by first saving the merged word document as a PDF and then using ImageMagick command:

magick.exe -density 300 PT-4x6-Color-Merged.pdf[0-117] 
-background white -alpha remove -resize 770x996 -gravity
center -extent 800x1200 element.jpg

Version 1.0

My previous classroom had a very large blank wall to accommodate a very large periodic table.  This is how it looked in my classroom.

The data is mostly based on the information in the element data base downloaded from Central High School’s website in St. Paul, MN, with a few corrections and additions from Wikipedia.org and WebElements.com.

The Periodic Table

Here are the printable versions:

Periodic Table – Merged (MS Word .doc)

Periodic Table – Merged (PDF)

UPDATE:  I’ve since created a version with two elements to a page so it’s not quite as huge.

Merged-half-page (MS Word .docx)

Source Files

These files were used to produce the periodic table using MS Word’s mail merge capabilities. Should you like to change it to your liking, you can download these files and produce your own.

PT Element Data Base (MS Excel .xls)

PT Mail Merge Template (MS Word .doc)

PT Mail Merge Template – half page (MS Word .doc)

Electric Field Visualization Software (EM Field)

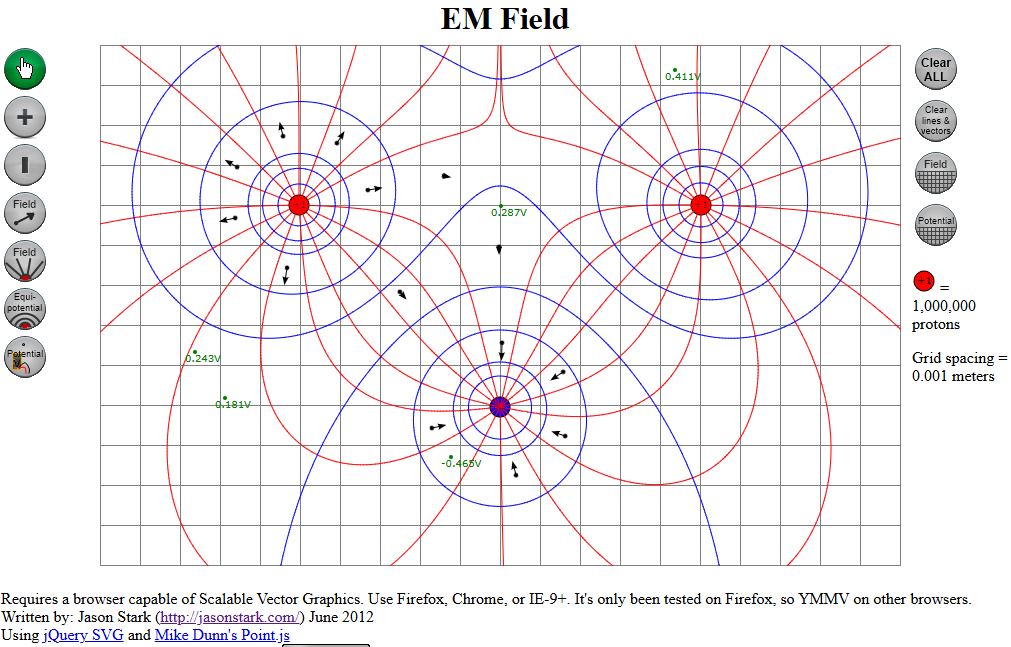
This summer, I’m at Arizona State University taking a modeling instruction workshop in physics – electricity and magnetism.  In dealing with electric fields (vectors and lines), potential, and equipotential lines, the curriculum materials rely on EM Field software that hasn’t been updated in many years and is no longer available for purchase or download.  The program is a 16-bit windows-95 era program and won’t even run anymore on Windows 7. 

So, I set out to try to build a similar simulation with the same functionality online to make it available to other teachers.

Check it out and leave me your feedback about what works, what doesn’t work, and any suggestions for improvement.

The following student-exploration worksheet is based on Unit 1 – Worksheet 3a from the Modeling E&M materials, but I thought I would provide it here in case teachers wanted to use it.  The directions are not very refined, but it is a start.

E&M Unit 1 Worksheet 4a – Web-based EM Field version

Empirical Formula Lab: Zinc Chloride

Procedures

1. Find the mass of a clean, dry, labeled beaker. (49.45 g)

2. Add zinc to the beaker and find its mass. (52.72 g)

3. Add 50 ml of HCl to the beaker. Record observations.

4. Place the beaker on a hot plate to evaporate the water.

Day 2:

5. Find the mass of the zinc chloride left in the beaker.  Make sure all water has been driven off.

Final Mass of Beaker with Zinc Chloride:  56.27 g

Now, you have enough information to determine the empirical formula of Zinc Chloride.

Synchronizing Files Between School & Home

As a new teacher, I did a lot of work at home. If that wasn’t painful enough, I can remember several days where I got to school and realized that the handout I spent too much time perfecting had been left at home on my printer.  Or, I had intentions of emailing documents to my school account or grabbing my flash drive, but being easily distracted, that often didn’t pan out.

After a few days of improvising lessons and trying to keep my students busy despite my unpreparedness, I quickly realized I needed a solution for this problem. And after trying out several strategies, here’s what I’ve found to be best:  Dropbox.

Dropbox is great! Basically, you can set it up on your home computer.  Choose a folder, and everything you save in that folder gets transferred to Dropbox’s servers.  So, it’s a great backup for when my computer inevitably crashes.  Install Dropbox on my school computer, and the folder with all my files is magically downloaded.  Make a change or add a file at school or home, and it replicates to the other location (unless my school district’s draconian filtering policies get in the way…).  As an added bonus, I can actually get to my files through any internet-connected computer by going to the Dropbox website.

Other benefits: I can share a folder to make it available to others.  When I get an email from a colleague asking for lesson ideas about stoichiometry, I can attach a few files from my Dropbox folder and contribute.  Likewise, when I get a great idea, lab, or lesson from a colleague, it goes in the appropriate folder within my Dropbox folder. Oh, and of course up to 2GB of storage is completely free!!! And, you can invite friends or do other simple tasks to earn more free space.

So, no more emailing files to myself. No more forgetting or losing my flash drive. My files are available to me virtually anywhere. I recommend this to my colleagues and students—I’ve had more than one instance where a student’s flash drive stopped working or got lost, and I always point them to Dropbox so it doesn’t happen again.

UPDATE September 4, 2011:

Our school network/IT department decided to block Dropbox, so I had to resort to my old-school methods for a while. However, when my laptop was stolen over the summer, having Dropbox was wonderful, as I lost almost none of my school work as it was all backed up on Dropbox’s servers.

UPDATE July 10, 2020:

It’s been a while, so let me catch you up: our district network policies went back and forth for a while as to whether Dropbox was blocked or allowed. By around 2013, it was blocked for good.

But, I had discovered Google Drive, which synced files between school and home the same way Dropbox did, providing a generous amount of storage with a free account.

Around 2015 or 2016, my district adopted Google Apps for Education, and I finally got an official school-sanctioned Google account (with unlimited storage!). Google Backup & Sync (or whatever they decided to call it now) has been my go-to for keeping files backed-up and synced between school and home.
Document Camera for Under $50

With the cost of LCD projectors coming down, many more classrooms are being equipped with this technology.  However, document cameras remain quite expensive.  As I often need to project an enlargement of something on the screen, I decided to see if I could get similar functionality from cheap and readily available materials.

Since my projector is wired to my computer, I decided to go with a webcam as the video source.  I’ve seen many plans online for connecting camcorders and digital cameras to computers, and while they may provide a better quality and higher resolution image, a webcam serves the purposes of a document camera.  It’s definitely less bulky and the desktop microphone stand is great to hold up the tiny webcam.

The webcam (at least the one listed below) is plug-and-play with Windows.  Plug it in, open My Computer, click on USB Video Device, and it works out of the box.  No special software or drivers necessary.  The Genius webcam listed below offers 1280 x 720 resolution, though I believe that can only be achieved through the included software.  The most I’ve gotten Windows to do is 640 x 480.

The webcam is a manual focus by turning the lens, but if you set it to view a document once, it should be set for the most part.  I’ve seen the autofocus on a document camera do some weird things at times, so that may be for the best.  There is also no zoom on the webcam, so you have to adjust the mic stand to get different fields of view.  Also, the usb cord on the webcam was only about 5 feet long, so if you want to position it further from your computer, you’ll want to get a USB extension cable.  Note that if you want to use a USB hub with your webcam, you’ll need a powered one.

If you want a full-screen view of your webcam on the screen instead of the smaller view available through Windows Explorer, try FS Cam View.

Parts List:

Black 19 Inch Musician’s Gear Gooseneck Black 19 Inch $3.99

On-Stage Stands DS7100B Basic Fixed Height Desktop Stand $6.99

Musician’s Gear Clip-Type Mic Holder $1.95

Genius eFace 2025 2.0 M Effective Pixels USB 2.0 WebCam $24.99

Assembly is fairly straightforward.  Attach the gooseneck to the desktop stand and the clip-type mic holder to the gooseneck.  Clip the webcam onto the stand and use some cable ties or electrical tape to run the cord along the gooseneck out of the way.  Plug it in to an open USB port on your computer and Windows should recognize your webcam.

So there you have it.  A document camera for $37.92 plus a few bucks for shipping.  As a science teacher, I’ve used it to allow lab groups to share their experimental data and graphs with the class and to enlarge some chemistry lab safety demonstrations so the whole class can see them.  It’s worked pretty well so far.  Someone may find a better way to connect the webcam to the mic stand, but the clip-type mic holder works pretty well for me.

I’m also keeping my eyes peeled for some type of probably USB-powered lighting system that I can attach to the whole contraption, though the webcam does a decent job in medium light conditions.  Best of luck to those who build their own, and feel free to share your own ideas.

Close